Experience a Smooth Ride in Revit - How to Keep your Project Intact and Moving
 If you’ve ever accidentally moved a linked model or deleted a bunch of column grids in older versions of Revit and found your whole world crashing down around you, then you’ll want to know about these practical ways to keep your project intact and speed up your overall work in Revit.
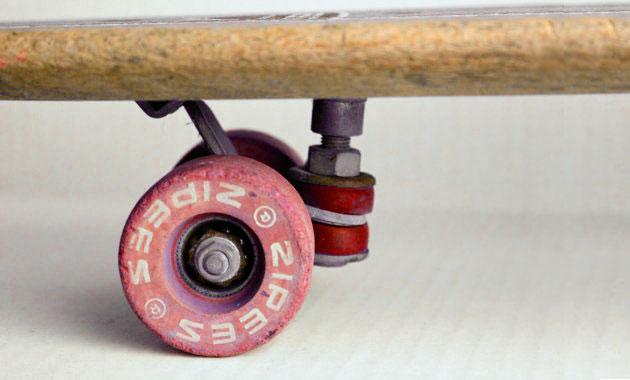
Like high performance skateboard wheels, Revit keeps getting better…
I love speed. When I snowboard, I love going fast. Really fast. When I longboard, I love going fast, too, but the consequences of falling are an order of magnitude higher. Snow can be soft and forgiving (sometimes, at least) but pavement is going to leave a mark.
Back in the early days of skateboarding (before my time, thank you very much), kids used to take metal wheels off roller skates and attach them to their board. Clay wheels were introduced in the 60s and weren’t much better. In the book ‘The Concrete Wave’, Bob Schmidt recalled that these early wheels “vibrated on the asphalt enough to jar every bone in your body and loosen every tooth. It was more like getting electrocuted than anything else.” Worst of all, even the tiniest rock could wreck you, pitching you headlong onto the unforgiving asphalt.
The good news is, in the 70s, urethane wheels were adopted, offering a ride of unprecedented smoothness and stability.
What has all this got do do with Revit?
I really like going fast with Revit, too. But back in the old times (Revit 2013), you’d be cruising along in your workshared model, happy as could be, when a tiny little rock, AKA that oblivious bull in a China shop that sits in the cubicle across from you that just inadvertently moved a linked model and deleted a bunch of column grids even though you had them pinned, sends your whole Revit world crashing down.
Never fear, because Revit 2014 introduced powerful tools to control the selection of elements. As Revit 2014 has been out nearly a year now, I expect that many of you have seen a demo or at least read a bit about these tools, but I find that in practice, many users haven’t yet adopted them into their workflow. I’d like to show a couple of practical ways these features can keep your Revit project intact and speed up your overall work in Revit, giving you a smooth, more stable ‘ride’.
You’ll find the Selection Filter tools in under the Modify button on the Ribbon and in the lower right corner of your screen as icon toggles.

![]()
These tools can appear subtle, but don’t let that fool you. They are POWERFUL and can really help keep your model in tact.
These are user settings that apply to your Revit application, not a particular model, and their state will be remembered when you restart Revit. Their value gets recorded in your INI file, so it can easily be restored or even rolled out throughout your office as a default – highly recommended.
These buttons are all toggles, allowing you to choose whether or not linked files, elements in underlays, or pinned items can be selected. The last two icons let you control whether you can select a roof or floor (or any element) by clicking on the FACE of the element (absolutely recommended) or whether elements can be click-dragged to move them, rather than using the move tool.
Why are these so powerful? Well, as standard practice, for years, when we insert a linked file or set up a column grid, we generally pin these elements so they can’t be moved accidentally. The problem is that, even though from that point on, we don’t ever want to adjust them, it is really easy to select them anyway. Not only is this frustrating, but as you know, pinning an element doesn’t prevent us from DELETING it. It’s crazy, I know. Many ex AutoCAD users surmise that pinning is analogous to freezing a layer in AutoCAD. This is not true. Pinning only prevents an object from being moved. It’s Properties can still be messed with and it can be deleted entirely.
The smooth riding urethane method for keeping your important elements in tact in Revit 2014 is simply to pin them, then uncheck the ‘Select Pinned Elements’ option. Never again do you have to worry about inadvertently editing those elements ever again. If this option is unchecked, you won’t even be able to Unpin the elements, as they can’t be selected in the first place.* Be aware, though, that other people in your team need to uncheck ‘Select Pinned Elements’ as well, or they will be able to manipulate these items. Again, by pushing out a revised INI file to everyone in your office, you can at least set their systems up this way initially. I recommend making it standard practice in your office that EVERYONE keep this option unchecked unless they have a very good reason to do otherwise.
For the ultimate piece of mind, you can always put your links and grids in their own workset and then check it out to yourself every morning and never relinquish it. That’s the only sure fire way I know of to keep everyone’s fingers out of your Revit pie.
My favorite of these selection features has to be the ‘Select by Face’ option. ![]() If you’ve ever painfully selected 50 walls before actually selecting the floor you were aiming for, this tool is for you. I keep it on most of the time, only momentarily turning it off when I want to select something that is sitting ON the floor, rather than the floor itself. Make good use of all of these selection tools to keep your Revit ride as fast and stable as possible.
If you’ve ever painfully selected 50 walls before actually selecting the floor you were aiming for, this tool is for you. I keep it on most of the time, only momentarily turning it off when I want to select something that is sitting ON the floor, rather than the floor itself. Make good use of all of these selection tools to keep your Revit ride as fast and stable as possible.
*Here’s a great practical joke/productivity killer: When your friend is taking a coffee break, go to his system and add a random door somewhere, pin it, then uncheck ‘Select pinned elements’. When they get back, casually ask them to delete the door. Laugh like crazy when they complain about Revit being ‘broken’ or ‘haunted’. If you really want to look like a hero/be a punk, set up a Keyboard Shortcut when they’re still on break so that ‘Select Pinned Elements’ is PO or something. Then, when they ask for help you can slyly type PO before showing them how easy it is to pick the door. Act like they’re crazy. Then type PO slyly again before giving them another try. This could go on for hours. Of course, if they’ve already read my blog they might show you up. Or punch you.
By Patrick Villella, LEED AP, CADSoft Consulting
This blog was originally published on CADSoft Consulting's "A Word on BIM" blog and is re-printed here with kind permission.


